
Took me a while to get this blog post going. There is a lot of information out there. It took me looking over a bunch of other blogs to get this working. I figured I would write up everything I learned and found in this guide. Thanks to the following references. Aaron Parker, Carl Stalhood, Jason Samuel, and Anton Van Pelt.
I’m sure there were some other links I used, but these were the biggest contributors.
This article assumes a couple of things:
- You already have a fully working Citrix Virtual Apps and Desktops environment
- You have an Azure tenant with an Azure AD Premium P1 license
- You have Citrix Gateway ADC 12.1 Enterprise license (or higher)
- Azure AD Writeback already configured
Azure AD Connect
This setup requires that you have your users setup in Azure already. In my case, I am using Azure AD Connect to sync my users up into my Azure AD tenant. I will walk through that setup here.
The first thing I’m going to do is add my Azure UPN suffix into AD. You will likely be doing this with a real domain. In this example I’m just going to use the onmicrosoft.com domain given to me by Azure. Go into the Attribute Editor on the user and change the userPrincipalName (UPN) for this user.
Next, on your AD controller, download Azure AD Connect https://www.microsoft.com/en-us/download/details.aspx?id=47594 and run it.
PLEASE NOTE: Azure AD Connect is a very powerful tool that can have ramifications on your environment that you may NOT WANT. This is a simple example of sync’ing a couple OUs for just password hash. If you want to understand more about Azure AD Connect, please read through the docs from Microsoft: https://docs.microsoft.com/en-us/azure/active-directory/hybrid/how-to-connect-install-roadmap#install-azure-ad-connect
Click Customize
Click Install
Click Next
Next, you should setup a service account in Office365 to use as the Sync account. This user needs to be a global administrator.
After you create the user, you will need to login to portal.azure.com as that user so you can change the password.
You likely want to set this sync user to never expire. You can do this with the following PowerShell command.
|
1 |
Get-AzureADUser -ObjectId o365sync@ryangalliervc3.onmicrosoft.com | Select-Object UserprincipalName,@{N="PasswordNeverExpires";E={$_.PasswordPolicies -contains "DisablePasswordExpiration"} |
Then click Next
You can let AD Connect create an account, or you can create your own. In this lab I just let AD Connect create it. Hit OK here.
Then click Next
In this example, I don’t have a verified domain name. So, click next here. (If you did, you will match up the UPN suffix with the Azure AD Domain name here.) 
In my example I’m going to limit sync to the OU of my users. 
Click Next here.
Click Next here
Click Next here
Lastly, hit Install.

Lastly, you need to turn on ForcePasswordChageOnLogon (This will allow AD controls of Password Expiration)
|
1 2 3 4 5 6 7 8 |
Set-ADSyncAADCompanyFeature -ForcePasswordChangeOnLogOn $true PasswordHashSync : True ForcePasswordChangeOnLogOn : True UserWriteback : False DeviceWriteback : False UnifiedGroupWriteback : False GroupWritebackV2 : False |
When this is done, you should see your users in your Azure AD portal. My environment only has the one testuser right now. Notice the user has the matching UPN suffix ryangalliervc3.onmicrosoft.com.
Certificate Authority
After all of this is done, we need to setup an Enterprise CA in our environment. I’m going to put this on the AD Controller. You can pretty much put this wherever. Add this through Roles and Feature

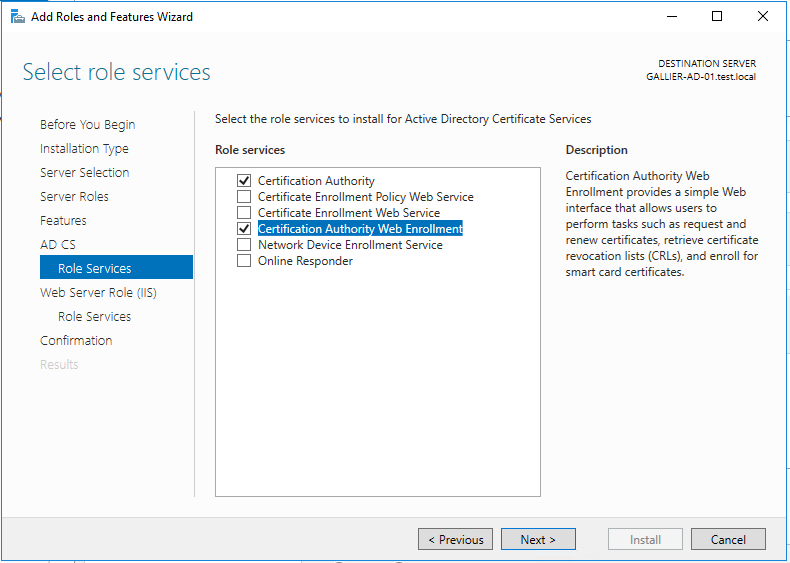

I kept all the defaults here.
Install
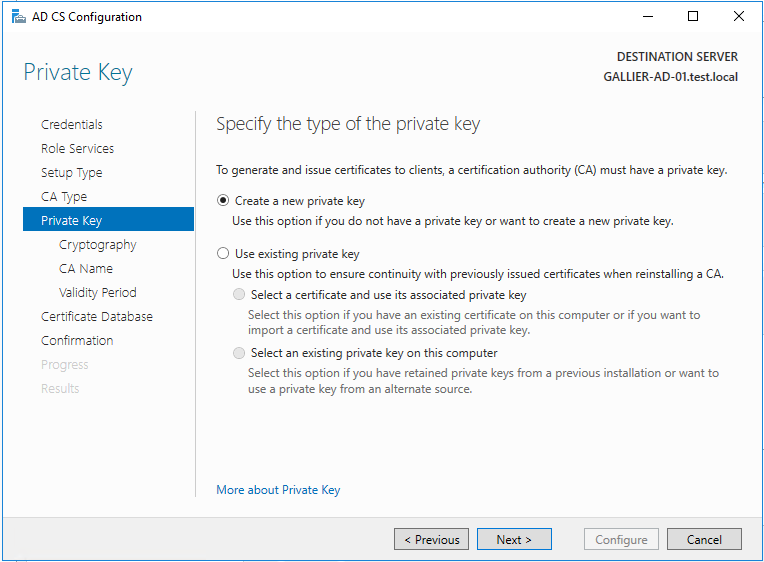
Configure the CA now


After this is done you need to give a cert to the AD controller. On the domain controller, open up mmc.
Click File, Click Add/Remove Snap-in, Select Certificates, click Add, then select Computer account, Expand Certificates (Local Computer), right-click Personal, click All Tasks, and then click Request New Certificate. Press Next. Select Domain Controller Authentication and press Enroll.


FAS Server
After this is done, let’s setup FAS. You can reference Carl’s article, or you can just follow along here.
Run autoselect.exe which ever method you like. (Mount the ISO, extract the ISO, etc) Click: “Federated Authentication Service”


It may or may not ask you to reboot. Reboot if it asks you.
Grab the ADMX/ADML files and put them on your domain controller.
Create a GPO that will hit the FAS, StoreFront, and VDA servers that points them to the FAS server.
Run GPUPdate on the FAS/VDA/StoreFront and make sure the registry key shows up that points it to the FAS server. HKLM\Software\Policies\Citrix\Authentication\UserCredentialService\Addresses
Once this is in place, we can start configuring FAS. Make sure you “run as administrator”.
Step 1, start, ok. 
You may or may not want to disable AutoEnroll. This is detailed in Carl’s article Under Step 5.
Now click Step 2, start, ok. It should find your CA that we configured above.
Step 3, start, ok.

Now go back to your CA. Open up the CA console and look for the pending request. 
Issue it. Just right-click it, all tasks, and issue. Your FAS server should go green now.
Click on the User Rules Tab, add your CA and point the Template to the Citrix_SmartcardLogon

Edit the Storefront Servers rule, remove domain controllers, and point it to your storefront server(s).
You can change VDA list if you want. By default it allows domain computers, which should be fine.
Click Apply and close the FAS console.
Back ON the Storefront Server.
Run the following commands on the Storefront server. (Make sure you change “/Citrix/test” to your store name.)
|
1 2 3 4 5 6 |
& "$Env:PROGRAMFILES\Citrix\Receiver StoreFront\Scripts\ImportModules.ps1" $StoreVirtualPath = "/Citrix/test" $store = Get-STFStoreService -VirtualPath $StoreVirtualPath $auth = Get-STFAuthenticationService -StoreService $store Set-STFClaimsFactoryNames -AuthenticationService $auth -ClaimsFactoryName "FASClaimsFactory" Set-STFStoreLaunchOptions -StoreService $store -VdaLogonDataProvider "FASLogonDataProvider" |
On the Delivery Controller, run the following command.
|
1 2 |
asnp citrix.* Set-BrokerSite -TrustRequestsSentToTheXmlServicePort $true |
On your StoreFront server, go to Manage Authentication Methods, and Pass-through from Citrix Gateway, and select Configure Delegated Authentication.

Check this box and hit OK.

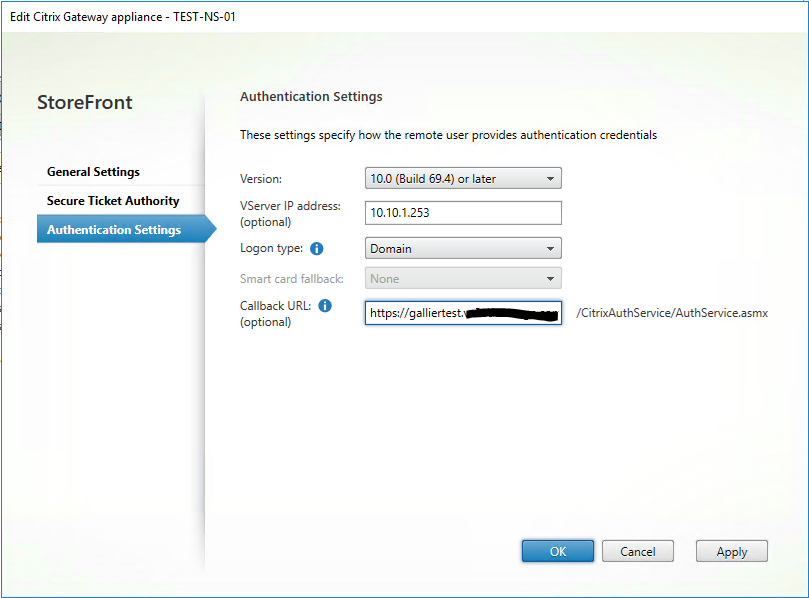
Now go to “Manage Citrix Gateways” and Authentication Settings. You will need to add your vServer IP Address and callback URL here for this to work.
Make sure the Store points to this Citrix Gateway in (No VPN tunnel) mode.
Azure AD
Login to your Azure AD portal and go to Azure Active Directory. Click on Enterprise Applications and click + New Application.
Click on Non-Gallery Application. (You will need an Azure AD P2 SKU for this.)
Call it something.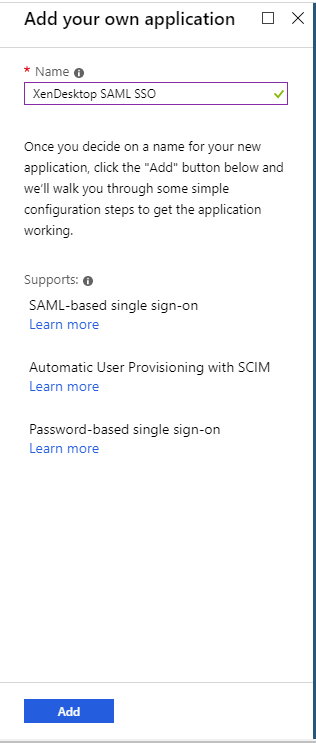
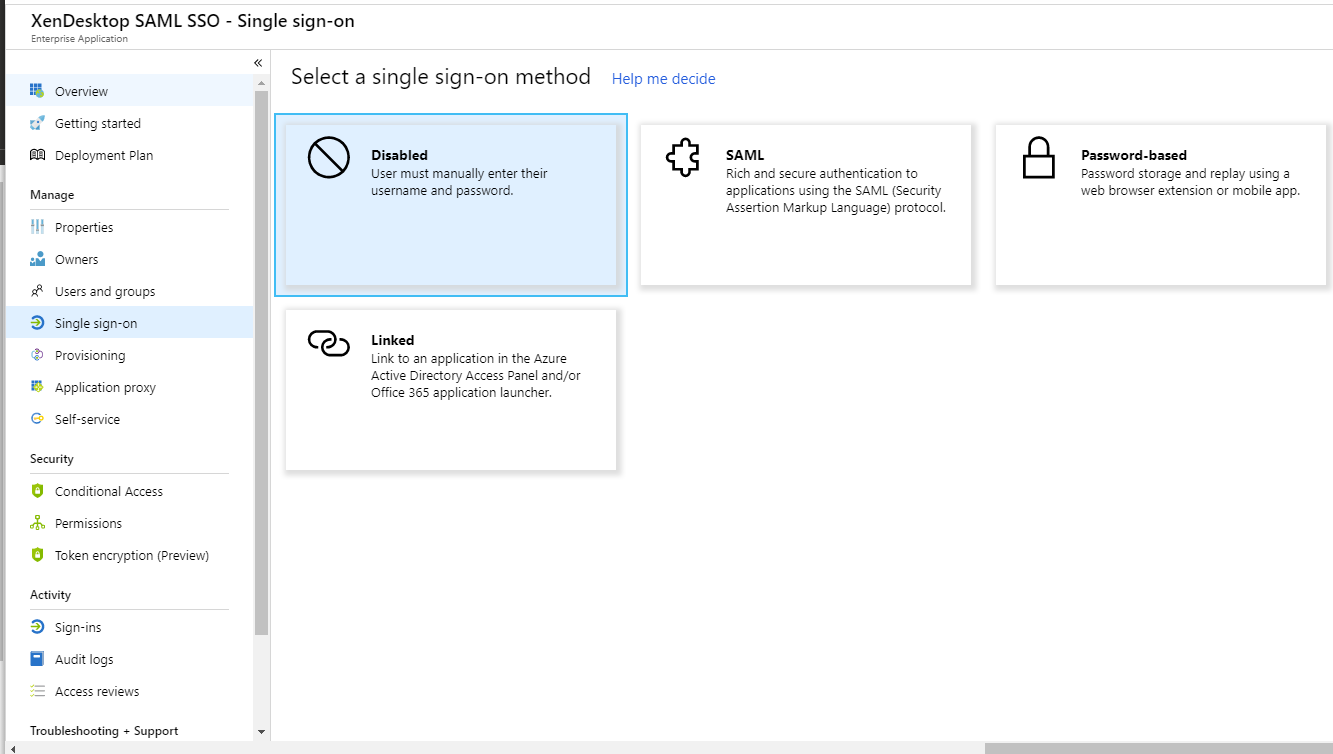
When that’s done, click on “Single sign-on” on the left and click SAML in the middle.
Edit “Basic SAML Configuration” under #1.
Identifier will be the URL to your NetScaler. In my example it’s https://galliertest.domain.com
Reply url is the same URL with /cgi/samlauth on the end.
Logout url is the same URL with /cgi/logout on the end.
Enter all of that and click save.
Next, download the Certificate (Base64). We will use this on the Citrix Gateway.
Then, copy the URLs in step 4 somewhere. We will need them for the Citrix Gateway.
Lastly, we need to assign users to this application. Click “Users and Groups” on the left. I recommend you create an AD Security group with all of your users and assign it here. In my example, I have only allowed my testuser.
Citrix Gateway Setup
I am running on 12.1-51.19 Citrix Gateway ADC with an Enterprise License.
First, upload the SAML certificate we downloaded above. Traffic Management / SSL / Certificates / Server Certificates. 
This will show up in “Unknown Certificates”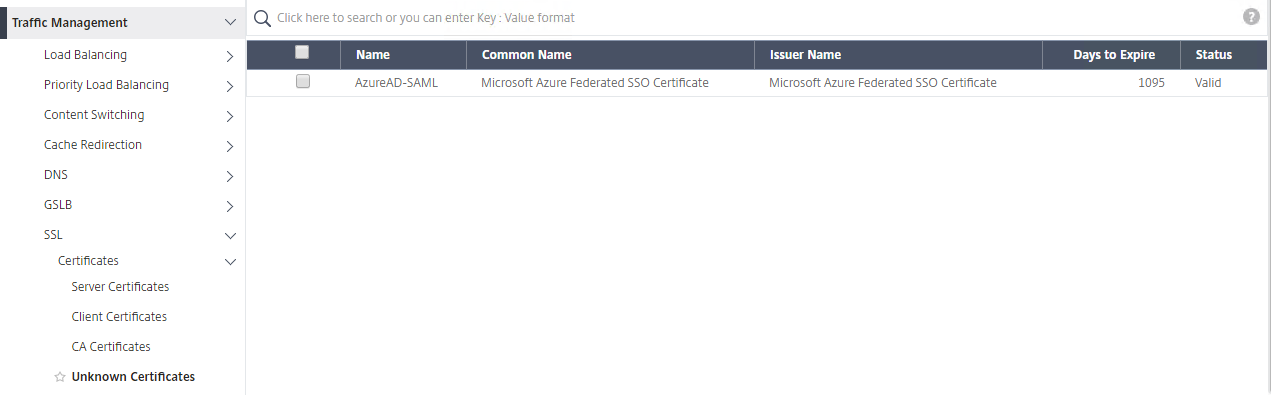
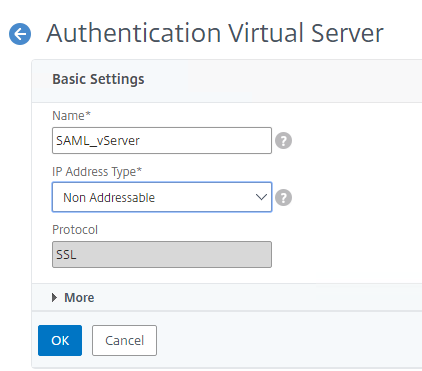
We now need to setup an Authentication vServer. Go to Security / AAA – Application Traffic / Virtual Servers. Click Add.
Bind your normal SSL certificate here.
Add an Authentication Policy
Add a policy.
Fill it out like this and Add an action (HTTP.REQ.IS_VALID).
First, uncheck “Import Metadata”
Fill it out like this and hit create.
Redirect URL = the Login URL you saved from Azure
Single Logout URL = the Logout URL you saved from Azure
Logout Binding = Set to REDIRECT
IDP Certificate Name = The cert we downloaded from Azure
Signing Certificate Name = Your normal cert
Issuer Name = Your URL to connect to Citrix Gateway
Apparently, there is a bug in the GUI on this screen. This is going to bomb. You need to use the CLI to add at least the baseline information, then come back in here and edit it. This is the command I used to get this to work.
|
1 |
add authentication samlaction SAML_Auth_Srv -samlIDPCertName AzureAD-SAML -samlSigningCertName wildcard.xxxxxxxxx.com -samlredirectUrl https://fqdn |
It should look like this when you are done.

Change Goto Expression to “END” and click Bind.

Lastly, hit Continue and Done to close out of the vServer creation. You should see a green dot next to this vServer now. 
Now we need to attach this policy to your Citrix Gateway vServer. In my scenario I have an existing vServer that already has an authentication policy. We are going to remove it and add this new SAML policy. 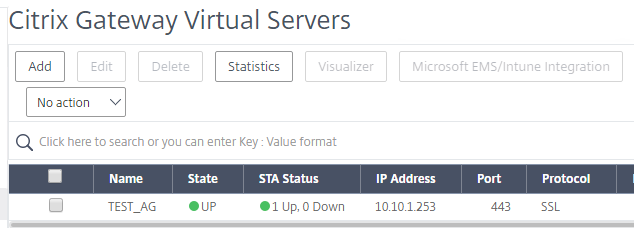
Remove your “Basic Authentication” Policy if you have one.

Now that this is gone, Hit +Authentication Profile on the right. 
Name it something and select the SAML_vServer we created above.
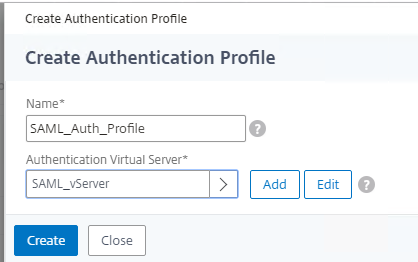
Hit Create, OK.
Next, edit your Receiver session profile to REMOVE “Single Sign-On Domain” from the Published Applications tab. (This example has a value in it. That value you will be removing.)
Hit OK, Close, and Done.
Now let’s test. Start with the website. I enter my URL. https://galliertest.xxxxxxxxxx.com. This redirects me to AzureAD to login. I put in my testuser account.

I login, and here are my apps/desktops! 
Now let’s test Workspace App.


NOTE: In our case we have other SSO based apps that use AzureAD for auth. You will probably want to adjust your storefront timeout accordingly. Otherwise after 5 minutes, Storefront will time out your credentials and you will have unhappy users needing to login too often. 🙂
See this CTX article – https://docs.citrix.com/en-us/storefront/current-release/manage-citrix-receiver-for-web-site/communication-timeout.html
That’s it! Have fun!
#Virtual_Apps_Desktops
#XenDesktop
#CitrixADC
#SAML
#FAS
#Workspace
#Citrix_Receiver
#Blog
#2021Top10Blogs