Synopsis
In this example. We will be using Microsoft Network Policy Server (NPS) as the main Radius server. Using NPS we can setup 2 groups, which will allow us to setup read-only users (or whatever command group set you want) to login to ADC Admin portal without MFA, and forward any Admin logins to Duo Authentication Proxy to login with MFA. In this example I have NPS and Duo Authentication Proxy installed on the same server.
Duo Proxy Config
We will be using the same Duo configuration from Part 1
You will need to add the following IP/Subnet information into the authproxy.cfg file. You can edit this file by running the “Duo Authentication Proxy Manager” application. Then Validate/Save/Restart the Duo Auth Proxy
|
1 2 |
radius_ip_2=127.0.0.1 radius_secret_2=secret2 |
Microsoft NPS configuration
First thing we need to do in NPS is add the ADC as a Radius Client.
Radius Clients Configuration
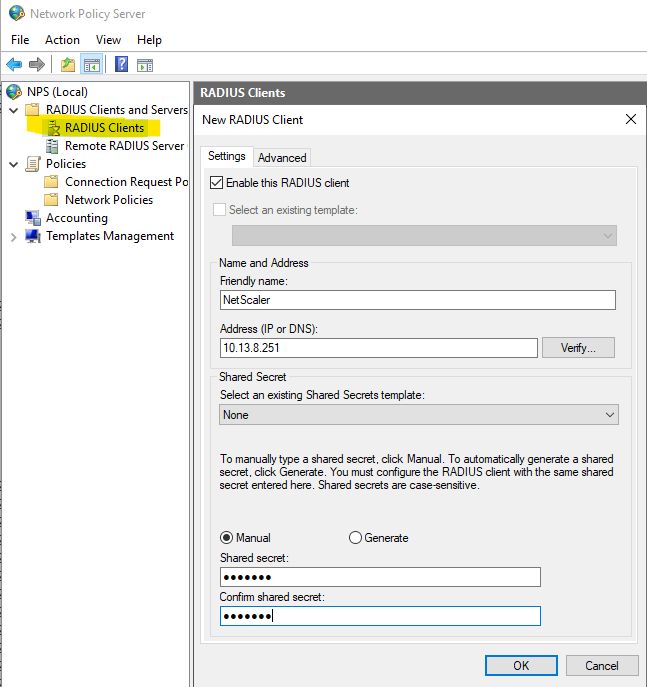
Go into NPS, right-click “RADIUS Clients” and select New. Add the Friendly Name, IP Address (or DNS), and shared secret you want for this specific device. (Use the NSIP here) (If HA, need both NSIPs as two different devices)
Remote RADIUS Server Groups Configuration
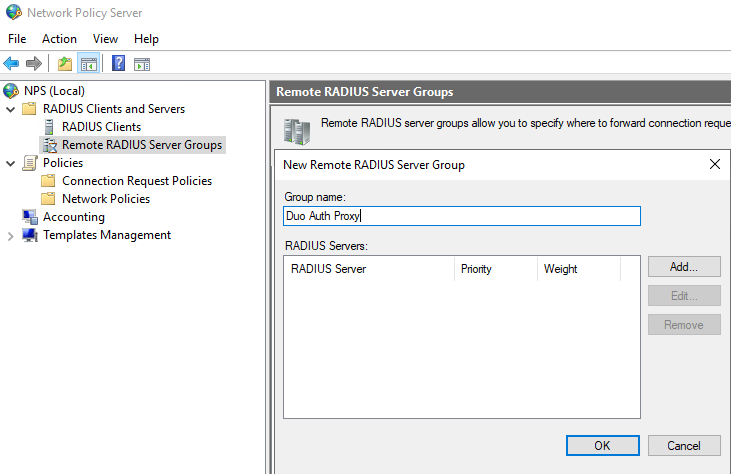
Next, right-click “Remote RADIUS Server Groups” and click “New”. Here you will first setup the Name, which is your Duo Auth Proxy. Click “Add”
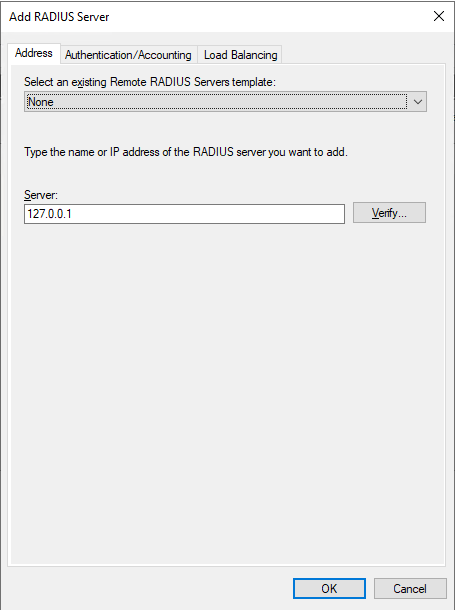
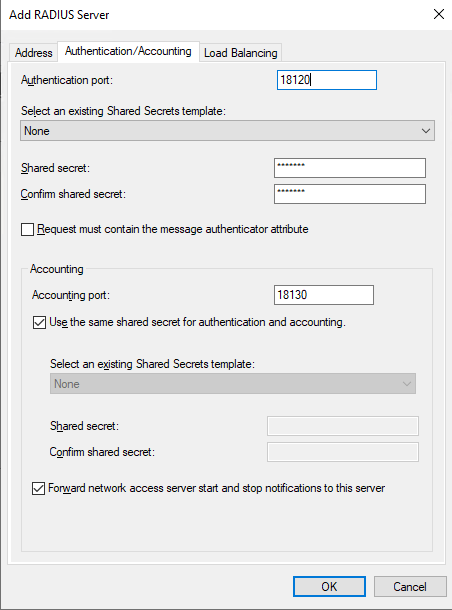
You will add 127.0.0.1 as NPS and Duo are installed on the same server. Under “Authentication/Accounting”, make sure you select the port/secret you configured the Duo Auth Proxy section from Part 1 (likely 18120, as NPS is using 1812).
Connection Request Policy (CRP)
Right-Click “Connection Request Policies” and select “New”. Add “Duo Proxy Auth Forward” – “Connection Request Policies” will now be known as CRPs.
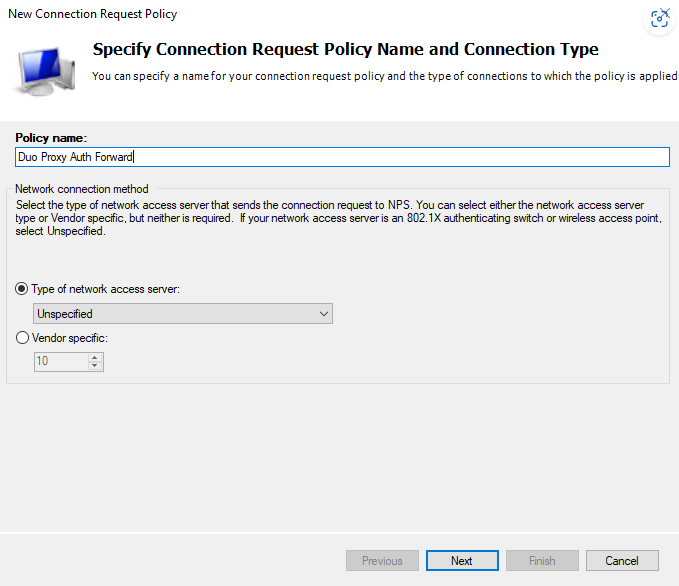
Here we can specify conditions. This is where it can get simple, or complicated, depending on your environment.
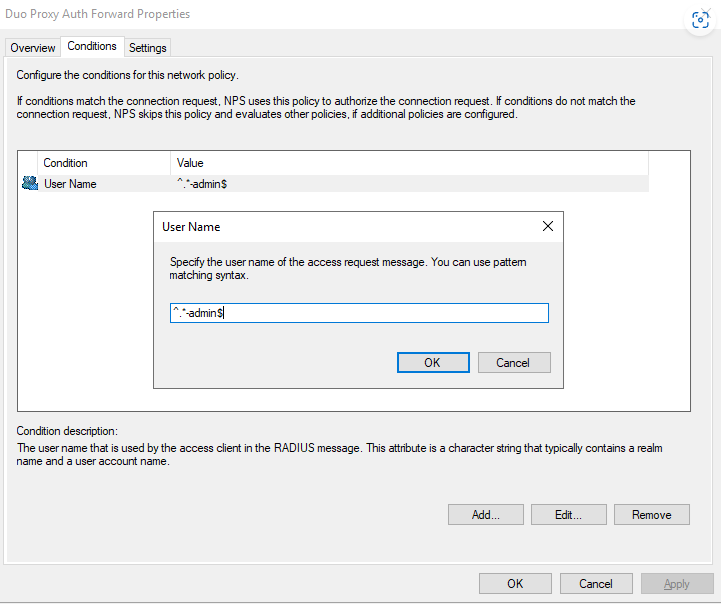
You cannot use Windows Groups to forward on a Connection Request Policy. You can, however, do username filters. You can use RegEx to specify what usernames you want to be forwarded. This example will forward all -admin users to the Duo Auth Proxy. ^.*-admin$. Enter this and hit OK, and OK. (Keep in mind that we have already locked down the Duo application to a group of users.)
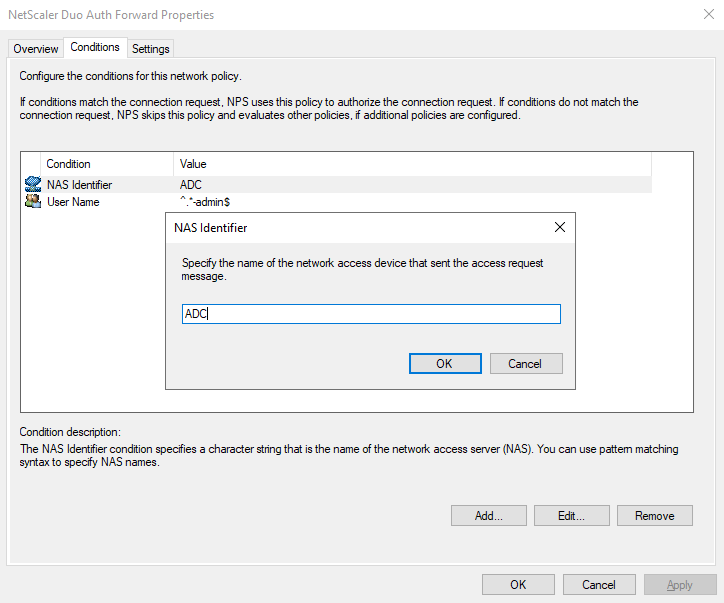
I will also be adding the “ADC” NAS Identifier we setup in Part 1.
In all cases, you will then point the Authentication to the Duo Auth Proxy Remote RADIUS Server group you configured above.
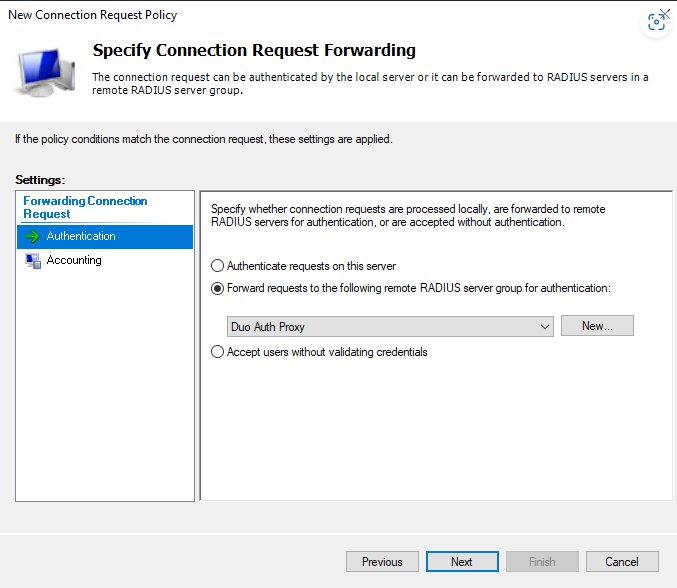
Now we will need to setup a RADIUS attribute to make sure these users become ADC Admins when they login.
Under Settings – Vendor Specific – click “Add” Select “Vendor-Specific”
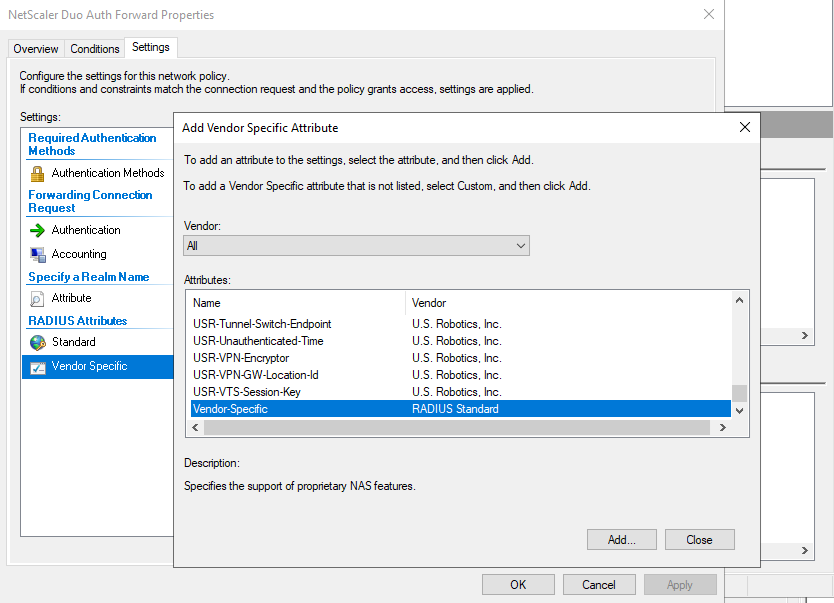
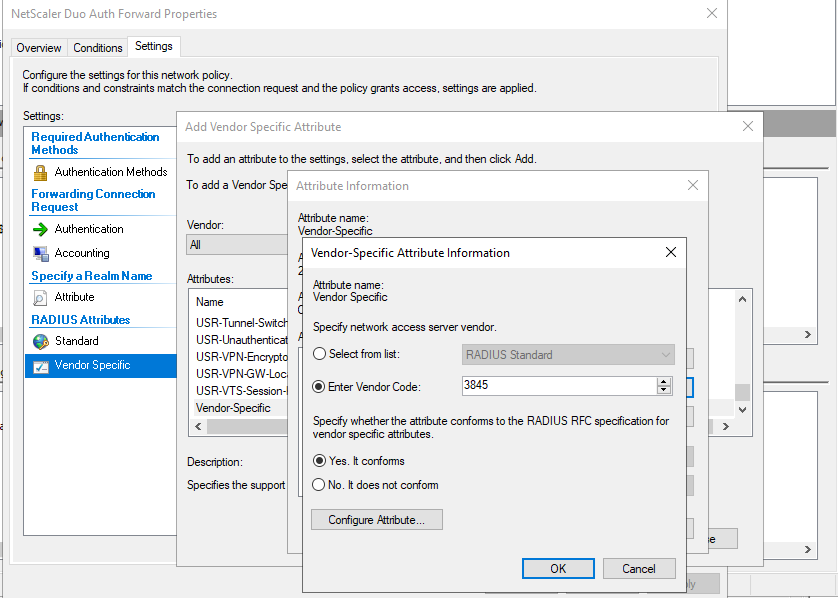
You will need to create Vendor Code 3845, and select “Yes, It conforms” and click “Configure Attribute”
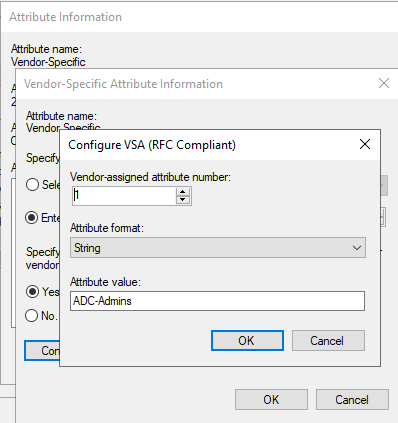
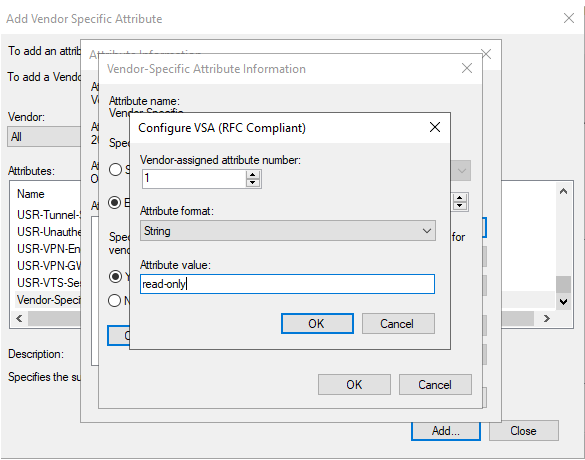
Then setup the Vendor-Specific Attribute like this: Make sure your group name matches with what we are going to configure on the ADC (Shown below)
Make sure you have the policy enabled, and move it towards or near the top.

Network Policy
Now we need to make a Network Policy for the “read-only” users. Right-Click “Network Policies” and select New:
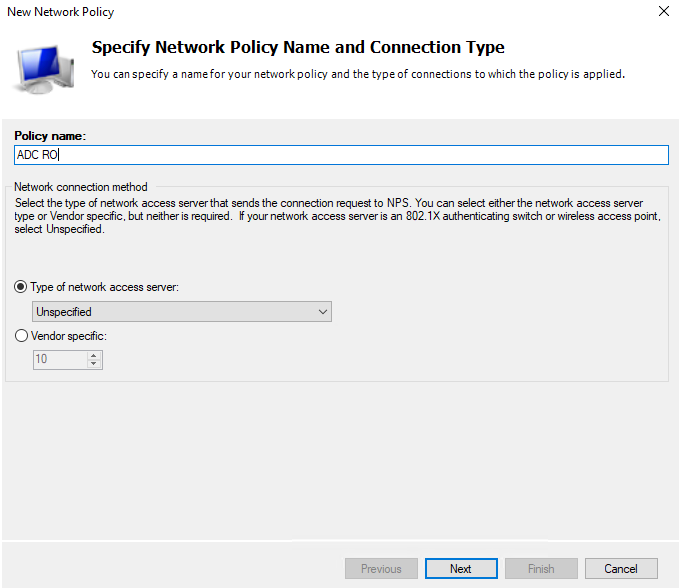
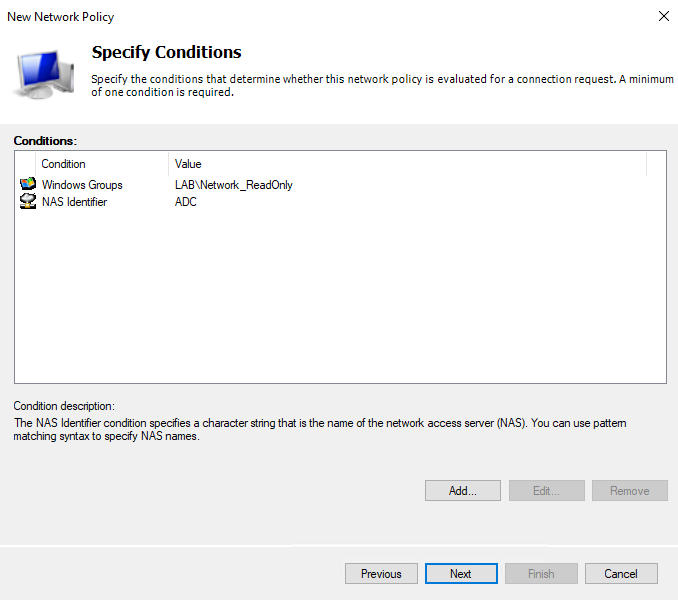
I have this setup via AD Security group, and still use the same NAS Identifier “ADC”
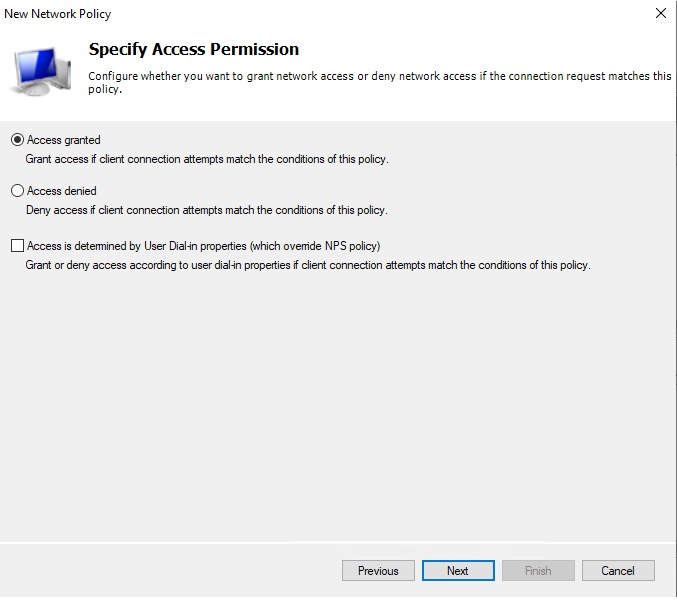
Now, because we are also piggie backing on a Duo configuration, Duo only supports Radius PAP ☹ So, we need to make sure we select PAP here:
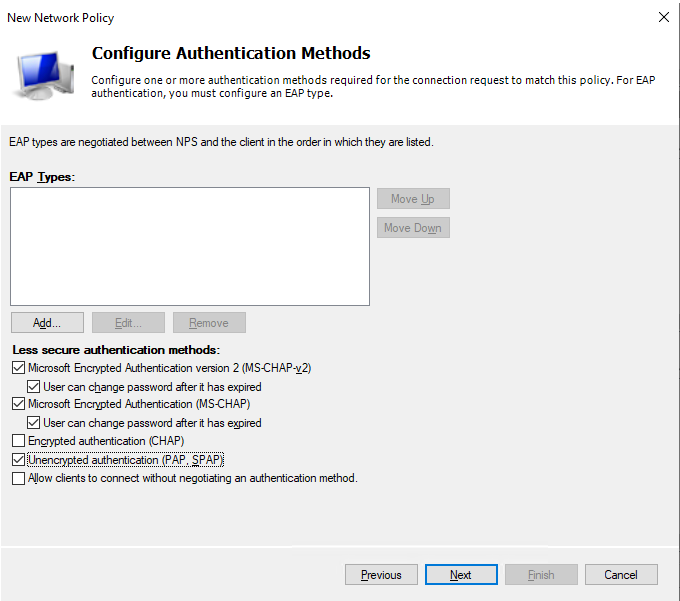
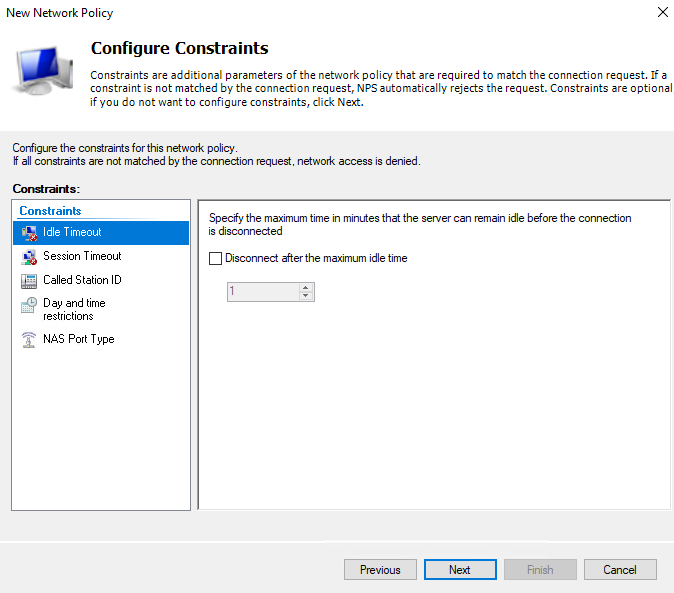
We will not be configuring any constraints.
You will add the exact “Vendor-Specific” attribute as above, but this time we will be doing “read-only”
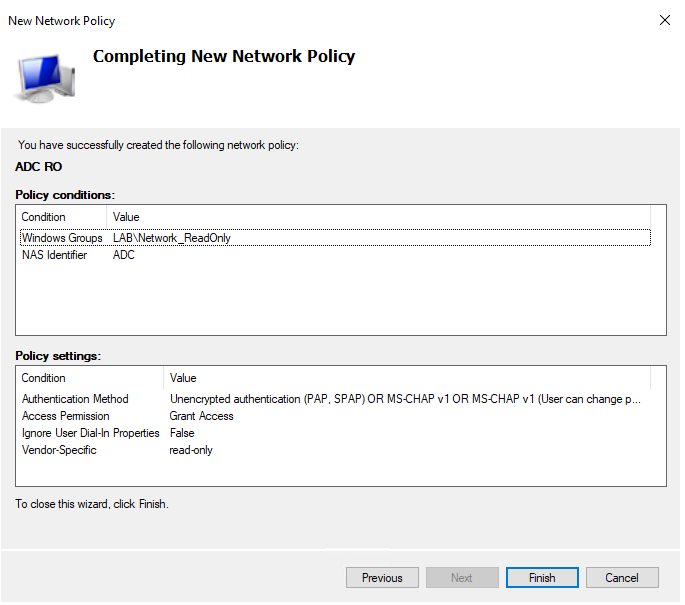
Click finish here. This is the complete setup for NPS. Next, we need to set some things on the ADC.
ADC Configuration
First, we need to setup a command group for Radius, so the users that can login get superuser rights (or really whatever rights you want them to have)
Go to System – User Administration – Groups – and hit “Add”. Set it up like the below (for superuser access) and click “Create”
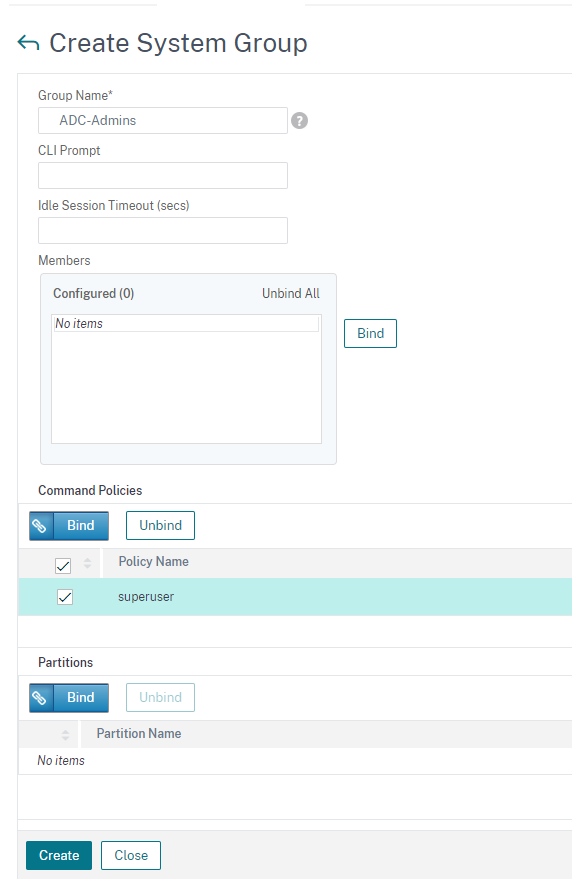
Next, setup another group for read-only users.
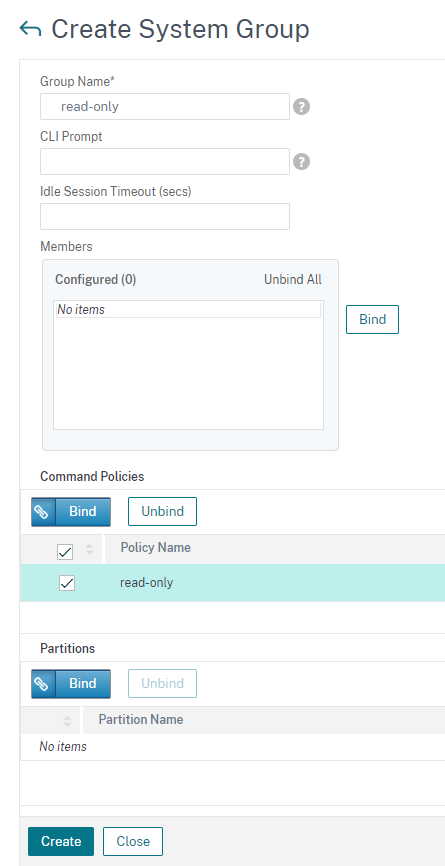
You should have two groups now:

Like the Part 1 configuration, we will be setting up a Radius Server, but this time we are going to use port 1812, Time-out of 60 seconds, and set it for the secret we configured in the RADIUS Clients section above.
Go to System – Authentication – Basic Policies – RADIUS – Servers – and click “Add”
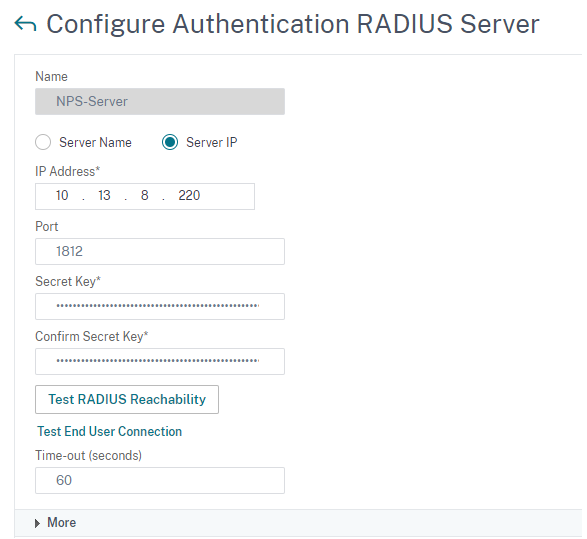
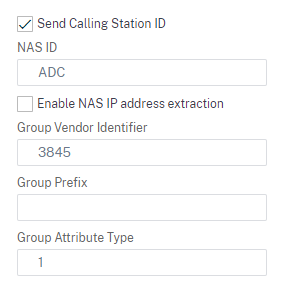
Click “More” and set these other attributes and save it.
After saving this section, go to System – Authentication – Advanced Policies – Authentication Policies – and click “Add” and point it to your Radius Server above.
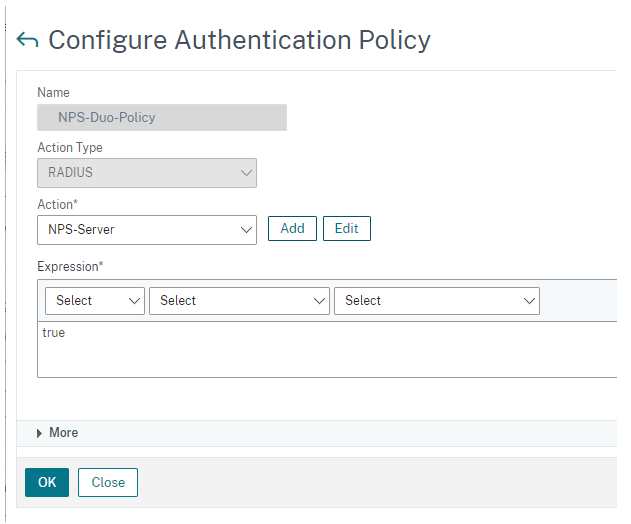
After you create this, you need to bind it globally. Click on “Global Bindings” in this same section.

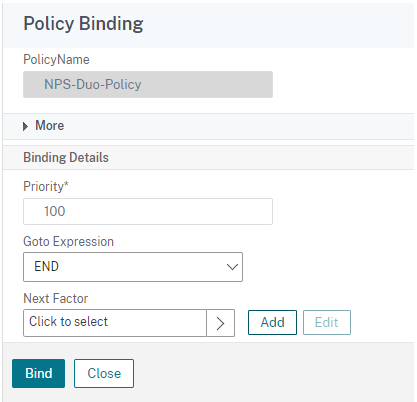
Set it up like this and click “bind” and click “done”
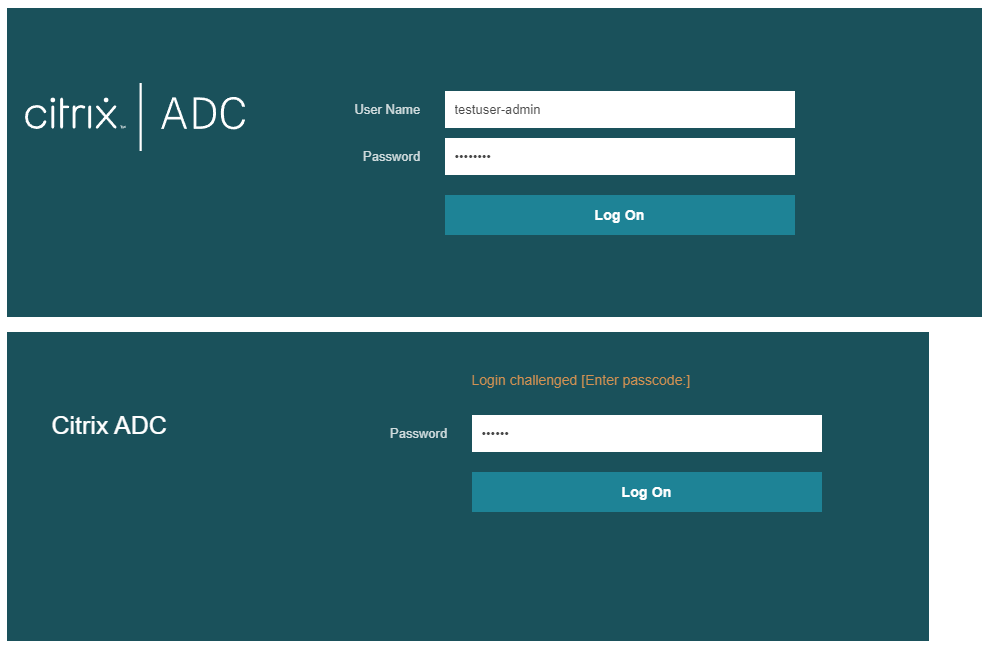
Now, let’s take a look at the authentication for a -admin user.
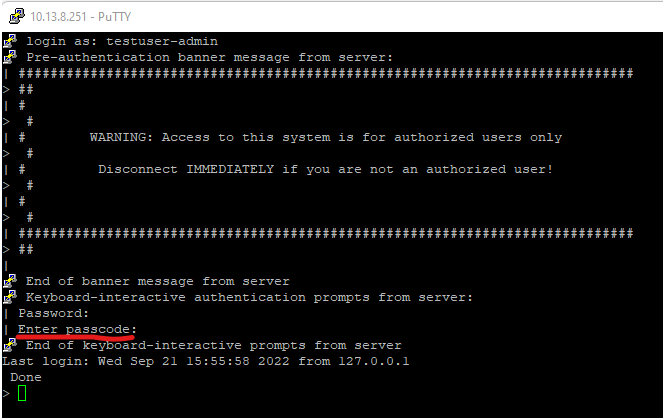
And SSH:
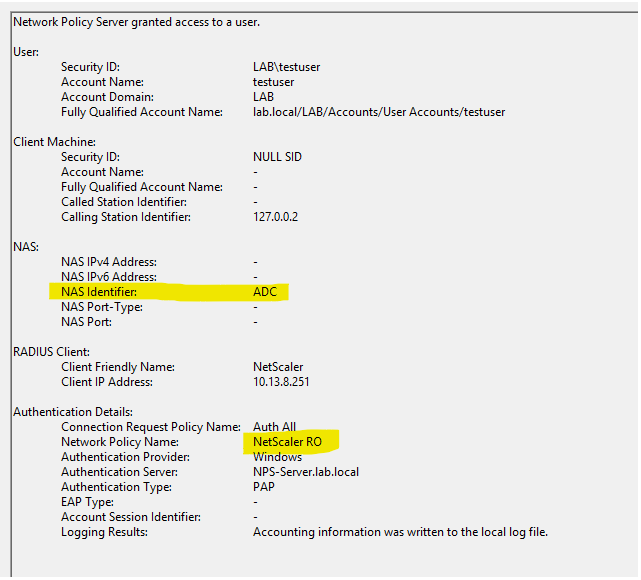
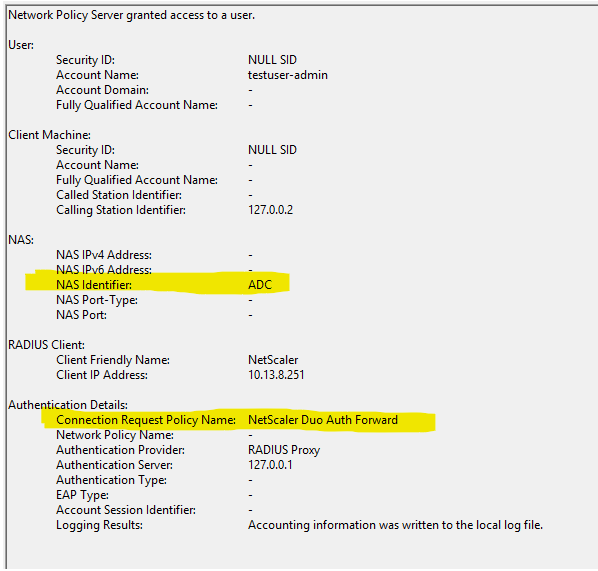
You can see this matching in NPS:
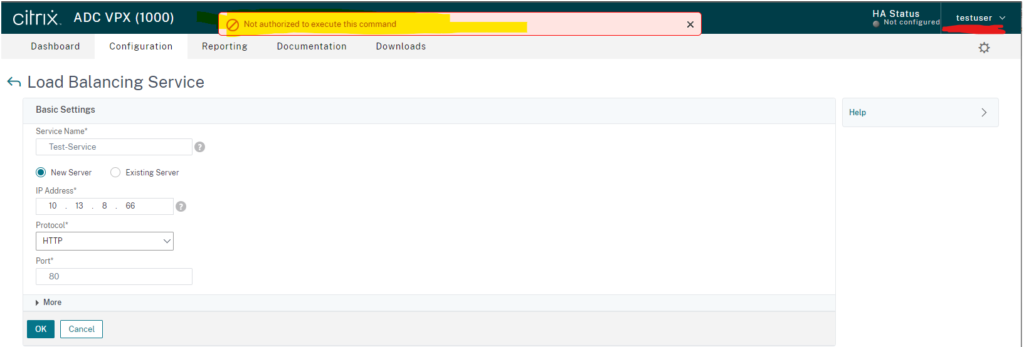
Now, let’s look at the restricted user.

See how we cannot add any configuration.
You can see this match in NPS:
